How to write cursive O and o
Capital O is a big oval closed over the top, with a small loop inside the top half that exits to the right. Lowercase o is a closed oval with no upstroke; when a letter follows, a short bridge at the midline carries the pen on.
Capital O
Tall: baseline to topline.
At the top of the oval, a little left of centre.
Near the top, on the right. The pen lifts; the next letter starts on its own.
Lowercase o
Short: baseline to midline.
At the midline, on the right side of the oval.
At the midline, where it began. When a letter follows, the bridge runs right from here.
The lowercase o does not come down to the baseline to join. It leaves from the top, at the midline, with a short bridge. That is what makes the o join to the next letter look different from an a.
Common mistakes with capital O
- The oval is not closed, so the O reads as a C.
- The inner loop is drawn so big that it fills the whole O, so it looks like a second letter inside the first.
- The oval is drawn upright and round like a print O, without the slant.
Common mistakes with lowercase o
- The oval is not closed, so the o reads as a c with a hook.
- The bridge is left out, so the next letter starts at the baseline and the o looks like a c.
- The bridge sags, so the following letter is started too low.
Joining o to other letters
Capital O lifts before the next letter, so start the second letter fresh. Practice the lowercase pairs until each join feels like one movement.
Print a practice sheet for O and o
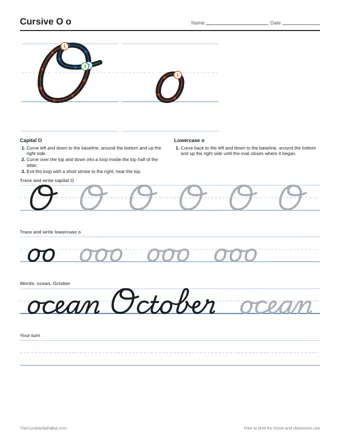
The sheet has the numbered stroke guide for both letters, rows to trace, two practice words and a blank row for writing on your own.